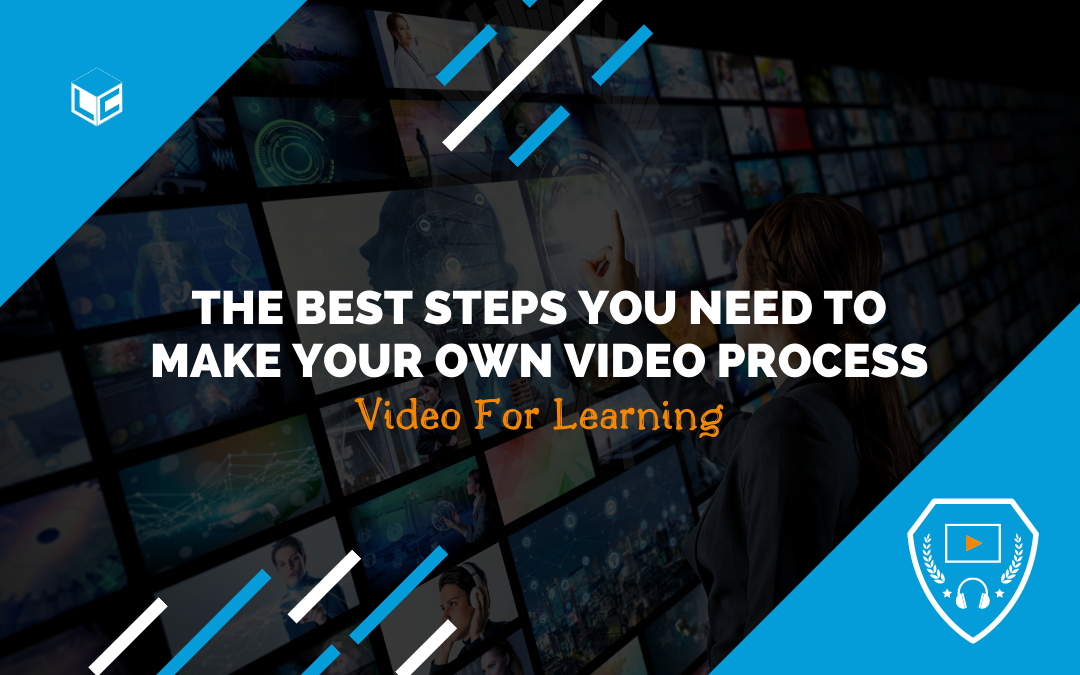
Making an effective instructional video that delivers on the promise of learning video requires that you follow a process. This post delivers the Best Steps You Need To Make Your Own Video Process. I want you to find your own process so that you deliver on the promise of learning video, which is to improve the knowledge, skills, and behaviors of your learning audience. Let me be clear, these are the best steps you need to make your own videos but you don’t need to follow them all. You need to create your own process that helps you meet the business purpose! Read the steps and the annotations to help you decide what your process should be!
Refresh Your Memory
This post refers to the last milestone of my Video For Learning (VFL) program. If you want to review or are just joining me, I previously covered steps 1-7 of the Making Your Own Training Videos process. Each step contains a series of sub-steps and checklists, all organized for you to easily follow along as you make your own learning videos.
Step 1: Set Your VFL Goal
Step 2: Write the Script
Step 3: Plan the Video
Step 4: Make the Video
Step 5: Edit the Video
Step 6: Distribute the Video
Step 7: Evaluate the Video
Do you want to learn how to make your own videos from me? Check out: What is the VFL course – Video for Learning? I’d love to talk to you about joining an upcoming cohort. Email me: chris@learningcarton.com
The Best Steps You Need To Make Your Own Video Process
If you are making your own video process, I assume you have made at least one video following the processes I’ve laid out in the seven milestones of the VFL program.
In the VFL course, I ask my scholars to use the “My Video Process Template” to find their own process.
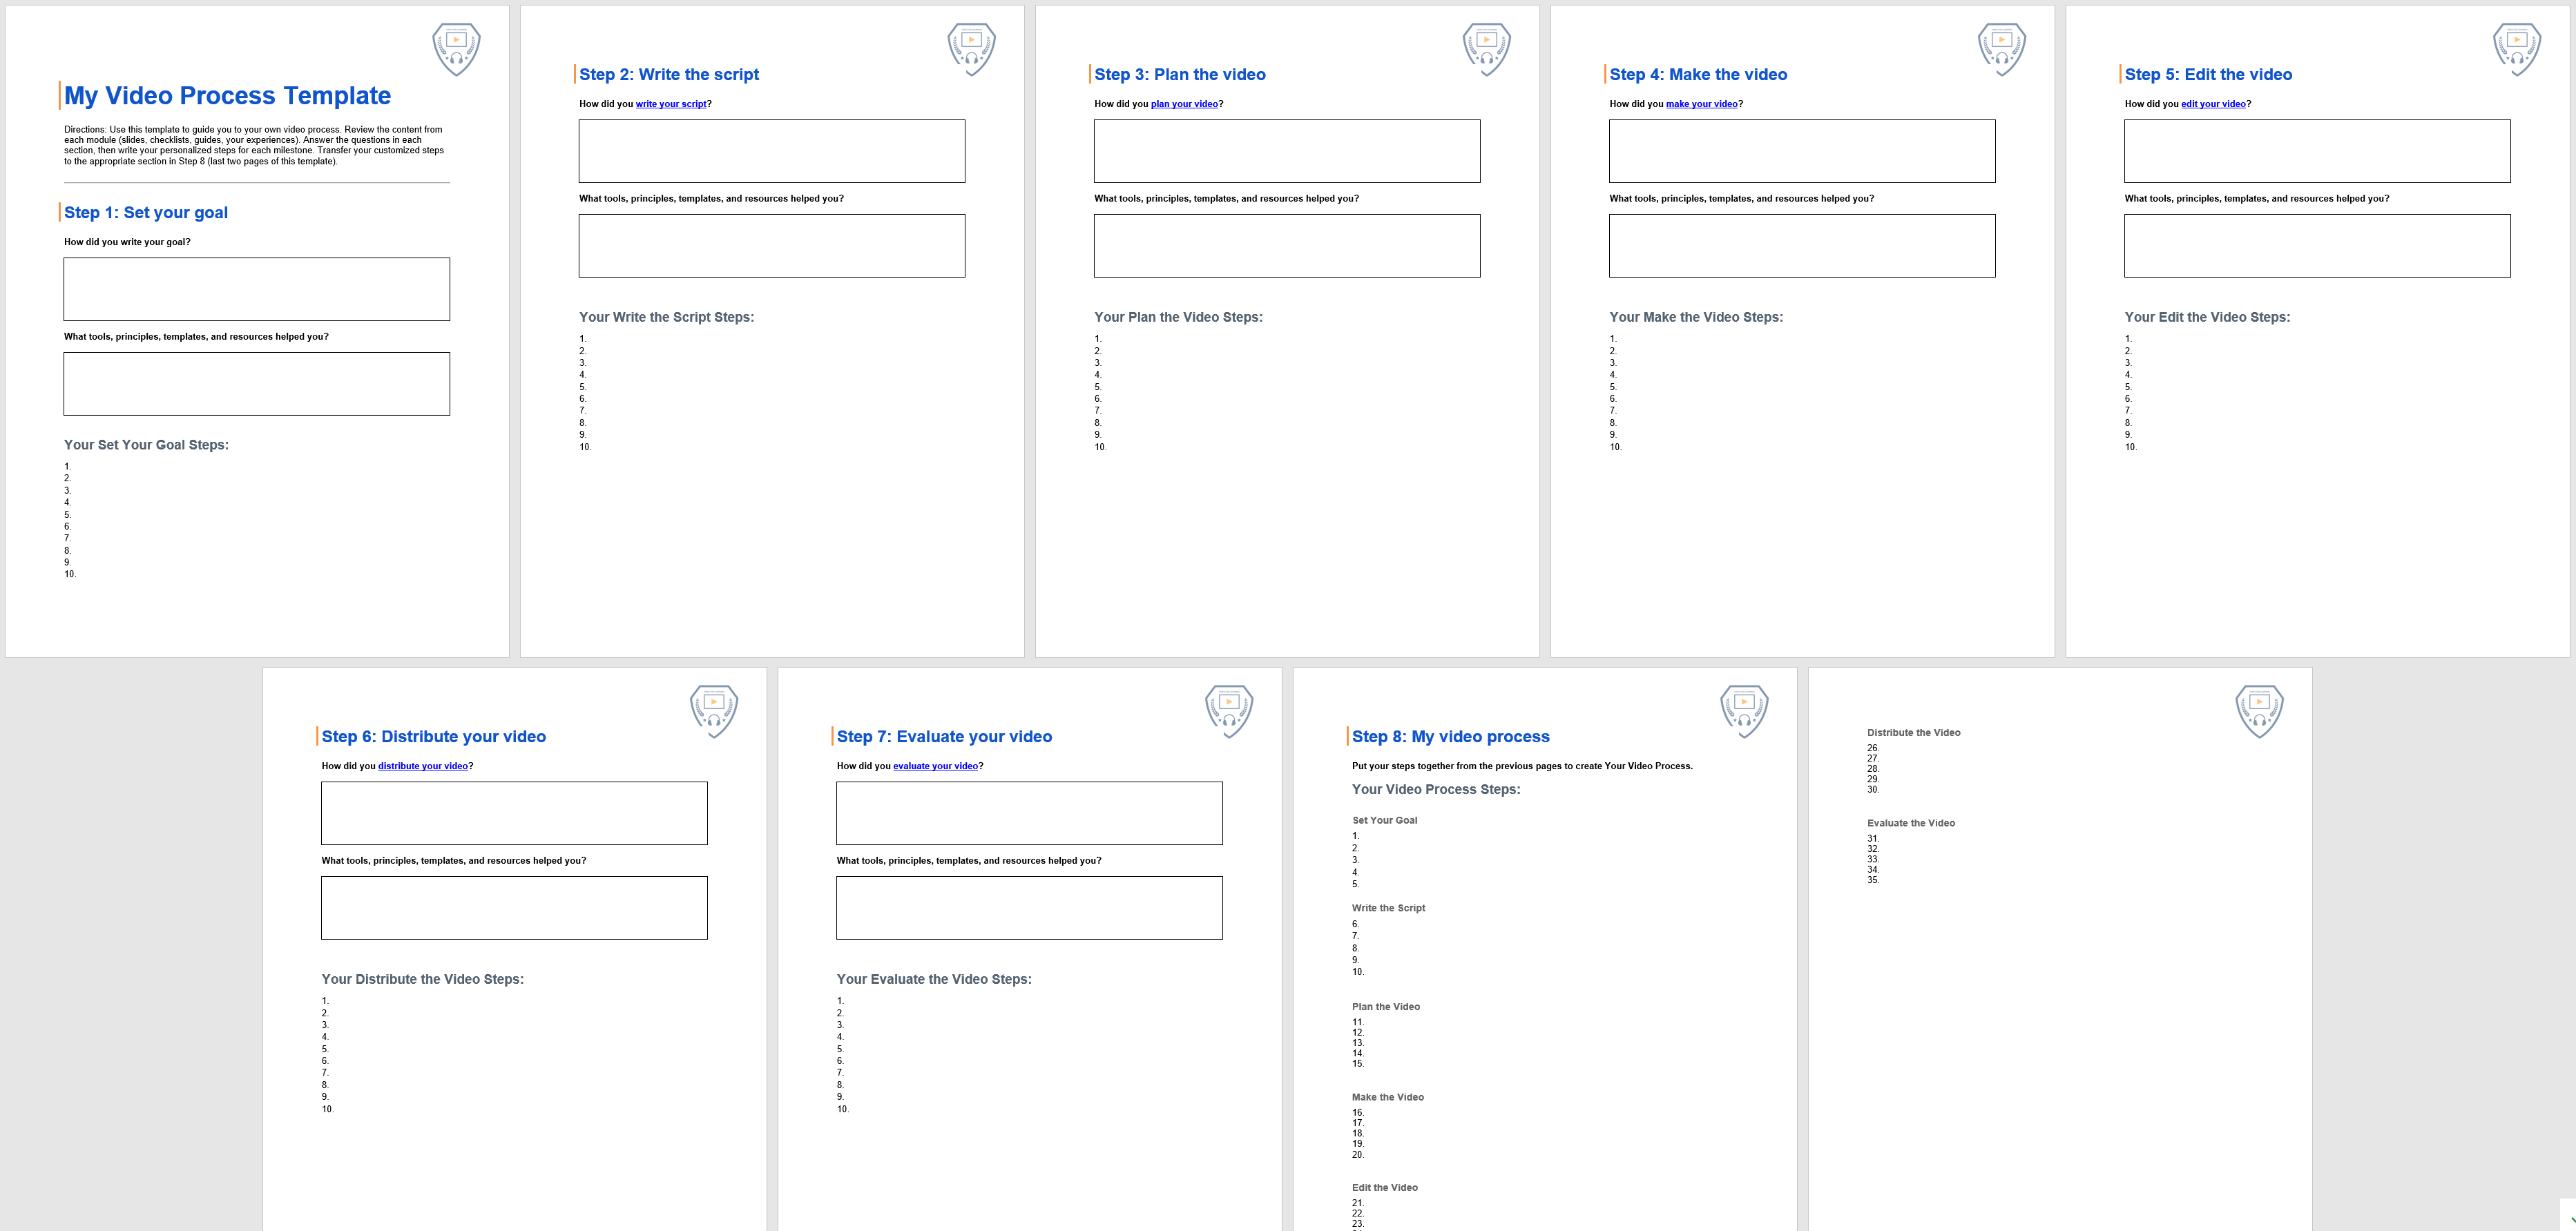
In the VFL program, you get to know the milestones one or two at a time each week. You learn, practice, and improve. When you reach the end, your task is to review the content from each module (slides, checklists, guides, your experiences). Then create your process by answering the questions in each section of the template.
Here are all of the steps with annotated links if you need to learn more about a particular step.
1. Embrace the VFL Way
-
- Done is better than perfect
- Meaning is more important than visual quality
- Follow the process
The VFL way is a mindset that will help you make a video by focusing on getting it done over making it perfect. Since you are making instructional videos, it’s so much more important to focus on the meaning over the visuals. And, you need a process to make effective videos! Winging it is only good with bleu cheese and celery!
How to Start Making Your Own Videos – VIDEO
What is the VFL course – Video for Learning?
Set your goal
2. Understand your business purpose
3. Refer to your learning strategy or design document
4. Write your KSB goal
5. Write your objectives to help you reach your goal
6. Use the Learning Video Rubric, to begin with the end in mind
7. Choose your type of video
Helpful links for setting your goal
Use This 15-step Learning Strategy To Plan Evergreen Online Training
Step 1: Set Your VFL Goal
The Best Video for Learning Guide to Make Training Videos
The Video for Learning Fundamentals
The 6 Types of Video for Learning
VIDEO: The Promise of Learning Video
VIDEO: The Phases of Video Production for Learning
Is it a Goal or an Objective? A Simple Explanation for Training
Write the script
8. Master the scriptwriter’s mindset
9. Learn storyboardese
10. Research your topic
11. Build-in two review cycles
12. Use a matrix to discover realistic dialogue
13. Use a three-column script template
14. Start with a storytelling formula or script template
15. Try dictation to speed up drafting
16. Draft concisely
17. Write actor and screen direction, and production notes
18. Follow the two-minute rule
19. Use 135 wpm as a guide
20. Revise with a table read out loud
21. Edit to omit needless words
22. Publish to a reviewing audience
Helpful links for writing your script
Part 1: Scriptwriting for Learning
Part 2: The Writing Process for Learning Videos
Part 3: 4 Must-Have Skills for Writing Scripts for Learning
Part 4: 5 Best Practices as a Learning Video Scriptwriter
Part 5: 3 Learning Video Storytelling Formulas
Part 6: The Mindset for Writing Learning Videos
Shhh! Scriptwriter’s Secret: Use these Formulas to Write your Training Video Scripts – VIDEO
Two of the Best Training Video Formulas
Plan the video
23. Use the 12–step planning checklist
24. Review the training needs
25. Create a project timeline
26. Create a visual storyboard
27. Create a shot list
28. Decide the day and time to record
29. Gather props and clothing
30. Scout the locations
31. Assemble camera, audio, and lights
32. Notify cast & crew – if applicable
33. Secure legal paperwork
34. Design your review cycle
35. Choose what to wear on camera
Helpful links for Planning your video
Step 3: Plan the Video – Making Your Own Training Videos
Use This 15-step Learning Strategy To Plan Evergreen Online Training
A Beginner’s Guide: Training Toolkit
Make your video
36. Use a project folder template
37. Copy your template folder structure
38. Paste it into your project folder
39. Rename the template folder
40. Delete any folders you don’t need
41. Put your script in the ID folder>script
42. Save your recorded video clips to the Source folder
Make CLASSY content
Camera
43. Use finger frames to find your scene
44. X marks the spot
45. Stand in – OR – use a plant on a stool
46. Tape the floor
47. Record and review
Lights
48. Key Light – sun or brightest
49. Fill Light – or bounce
50. Back or Hair Light
51. Adjust the “T” on the floor
Audio
52. Use a good microphone
53. Control the environment
54. Record and review
55. Do multiple takes – get it right
Set
56. Have props ready
57. Break the frame
58. Avoid clutter
Start recording
59. Check battery and storage
60. Press record & Perform
61. Review and Improve:
-
-
Good audio levels
-
Performance
-
Helpful links for making your video
How to Record Professional Learning Videos: The Ultimate Checklist
The Camera Gear You Need
My 15-Step Checklist I Use to Make Weekly Videos
Make the Video – Step 4 – Guide
The Computer Gear You Need
The Lighting Gear You Need
The Audio Gear You Need
How to Perform on Camera
How to Gain Confidence on Camera
How to Gain Confidence on Camera – VIDEO
Edit the video
Make PEACHY edits
PLAN
62. Launch your editing software
63. Create a new project
64. Review the purpose of the video
65. Create or import your bins/folders
66. Import video clips
67. Log and sort
68. Review your script
EDIT
69. Make a selects sequence OR
70. Create a rough cut (sequence)
71. Trim out wasted time
ADD
72. B-roll
73. Graphics
74. Music
75. Effects
76. Subtitles
CLEAN
77. Review and revise
78. Normalize audio
HONE
79. Fine-tune color correct
80. Choose your export settings
81. Review the exported file
82. Make changes if needed
YES
83. I’ve earned the Power of YES
84. Now I Practice, Practice, Practice = Good
Helpful links for editing your video
10 Things You Need to Know About Editing Video
How to Use Vimeo Review to Improve Your Learning Video
Step 5: Edit the Video – Making Your Own Training Videos
How to Edit Learning Video: The Ultimate Checklist
10 Steps You Need To Edit Learning Video
5 Pro-tips You Need to Edit Learning Video
10 Best Ways to Edit Video like a Professional
The Proven 15-step Checklist To Easily Make Weekly Videos
VIDEO tutorial: How to set up and future proof your video editing project folder
How to set up and future proof your video editing project
Distribute the video
85. Use a distribution prep sheet
86. Identify how you will share videos for review
87. Review the purpose of your video
88. Follow your review cycle process
-
-
Share tracked changes in Word templates
-
Use Review 360 to process course reviews
-
Use Vimeo Review to improve videos
-
89. Send an internal review email
90. Incorporate internal review feedback
91. Use a content review cycle: develop-review-edit
92. Obtain sign-off
93. Create subtitles
94. Notify everyone of the timeline
95. Prep for each upload location
96. Archive and backup
97. Add to training/marketing calendar
98. Start the update clock
99. Set a date to review the video
100. Create a reminder in your training calendar to review data
Helpful links for distributing your video
Step 6: Distribute the Video – Making Your Own Training Videos
10 Important Steps After You Finish A Live Training Video
4 More Proven Things You Need To Make Effective Training
We Need “Learning” Video Production Skills
How to Use Vimeo Review to Improve Your Learning Video
Who is the Consolidator? – VIDEO
How to Ask for Feedback in 5 Easy Steps
Use 5 Proven Things to Share your Learning Video
How to Use Vimeo Review to Improve Your Learning Video
How to Use Review Pages – VIDEO
Evaluate the video
101. Use the Learning Video Rubric
102. Activate your evaluation plan
-
-
Course
-
Video
-
103. Revise your process
Helpful links for evaluating your video
Step 7: Evaluate the Video – Making Your Own Training Videos
How to Evaluate Learning Videos with a Rubric
Evaluative Quizzes – 5 of 12 Learning in the Flow of Work Elements – VIDEO
My video process
104. Review the process and update it with detail so you can follow it the next time you make a video for learning.
Helpful links for making your own process
Step 8: “MY” Video Process – Making Your Own Training Videos
Conclusion
The Best Steps You Need To Make Your Own Video Process will guide from concept to final deliverable, no matter what kind of learning videos you create. The more videos you make, the more you’ll be able to hone your personal set of checklists and processes. Make sure you document them for future videos. Before you know it, you’ll be making videos as easily as you write emails! Use the hundred-plus steps listed above to make your own process. Then, go make some KSB videos that help people learn things!