I’m on a mission to help people make and use video for learning purposes. As a consultant people ask me, “What can I do to make my learning videos more professional?” I immediately respond with two things, “Improve your audio and your lighting.” This leads to more questions, more answers, and more questions by me, which I lump into a knowledge bucket called, “skills.” Improve your audio and your lighting, and elevate your pro-video skills. This will help you separate amateur from professional learning video. It’s true what they say: skills do pay the bills.
So let’s get to it!
I got the skills – what skills
To pay the bills
I got the skills to pay the bills ya’ll~~Beastie Boys: Skills to Pay the Bills (Listen)
Top Three Things that Separate Amateur from Professional Learning Video
If you are not a Beastie Boys fan, let me break it down for you a bit. Skills are part of the learning video promise. Our goal in making learning for an audience is to help them improve their knowledge, skills, and behaviors. Skills are also one thing that separates the amateur from professional learning videos.
So let’s get to it! Listen up, hear me! If you can’t hear and understand me, then my audio must be bad! And that’s no good.
Audio
Audio will separate the amateur from professional learning video. It is the most important factor. If the audio is bad, the whole video is bad. The top post on fixing audio in post-production (in the editing stage) says the best way to fix bad audio is “in the script.” I wholeheartedly agree.
Voice Actor and eLearning/Educational voiceover expert John Kissinger had this to share:
Engaging audio is all about your performance, not the sound of your voice. Not matter how sultry or resonant your voice — or how many times you’ve been told you have a nice voice — you have to be able to read a script fluidly and conversationally — narrating as if you were talking to friends, rather than lecturing to an audience or talking down to a group of preschoolers. That’s a skill that requires training and practice. And, it actually requires you to act. If you’re not a convincing actor or have trouble reading conversationally, don’t undermine your great course design. Please hire a pro to help keep your learners fully engaged.
A good actor with a poorly written learning scenario will create bad audio. However, bad audio is easy to create if you are using the wrong tools. Along with the proper microphone and attention to room preparation, bad audio is the result of an unprepared video creator/producer/videographer. Let’s look at two common learning scenarios to see why.
Live Event (Webinar, Zoom, Meet, Crowdcast, Webex, etc.)
If you are providing live video to an audience you need a microphone that is not built-into your computer. Using a headset will create better audio than any built-in computer microphone. For zero budget, your audio will be better if you use the headphones that came with your phone, they are still better than an onboard mic. Yes the earbud mic is good, but you are also removing the feedback from your computer. Think of a time when someone’s audio sounds super “echoey” like a baseball stadium announcer. This is caused by the speakers “feeding back” into the microphone, which causes the echo effect.
Live Event Mic Suggestions:
Option 1: For around $30, I’ve used the Logitech Over-The-Head Wireless Headset H600.
Option 2: To level up my headset game (around $100), I use a SteelSeries Arctis 5 – RGB Illuminated Gaming Headset.
Option 3: 7 out of 10 elearning experts I asked about microphones said they had the Blue Yeti Microphone (around $160) The Blue Yeti offers you the ability to change the pick-up pattern of the mic. The pick-up pattern refers to which part of the microphone “picks up sound.” Live events require that you are only picking up your voice so choose a mic that is called cardioid.
Option 4: If you have a quality webcam like the Logitech C920 Hd Pro Webcam Black, it has a decent microphone onboard that will gather good sound. Remember, you will still need headphones, earbuds or directional speakers to avoid creating a feedback loop.
There are pricier setups that include multi-hundred dollar microphones, mixing boards, pre-amps, software, etc. In order to get the skills to pay the bills sooner than later, you can start with a price point that fits your budget and practice. Level up your gear as you level up your skills.
Voiceover (Screencasts, Narration)
If you are making learning videos and creating the audio yourself, start with a good microphone. Newer models of iPhones (and Android phones) have really good microphones built-in. It is possible to create an excellent voiceover with the iPhone if you take care to record in a space that is suitable for audio recording.
Do you need to learn more about where to record? Check out these links:
The Complete Guide to Voiceovers
How to Record Audio Like a Pro
Beginner’s Guide to Voice Acting
Want a quick, easy, place to record right now? Take your iPhone and script (on paper, or laptop, or tablet) and go into a clothes closet. Audio is better when there are less hard surfaces off which the sound waves can bounce.
Voiceover Mic Suggestions:
Option 1: I use the Audio-Technica AT2020 Cardioid Condenser Studio XLR Microphone. It’s around a hundo ($100) and is used by several professional voice artists that I’ve worked with over the years. It is quality enough to record amazingly good voiceovers when used with the proper sound absorption and dampening in the recording area.
Option 2: (same as live event mic) 7 out of 10 elearning experts I asked about microphones said they had the Blue Yeti Microphone (around $160) The Blue Yeti offers you the ability to change the pick-up pattern of the mic. The pick-up pattern refers to which part of the microphone “picks up sound.” Live events require that you are only picking up your voice so choose a mic that is called cardioid.
If you are like me and enjoy a good deep-dive to research different models and price points, I suggest heading over to Scott Winstead’s post 17 Quality Voice Over Microphones for a Home Recording Studio.
I love b&h photo. They are a great resource for gear. Check out their buying guide to voiceover equipment.
You can also learn more about recording voiceover at these links:
Check out the ever-awesome Tim Slade’s, How To Record High-Quality Audio For E-learning
More great info from Scott Winstead, How to Set Up a Voice Over Studio in Your Home for Various Budgets.
Lighting
After audio, the second thing that will separate amateur from professional learning video is lighting. This is quite simple to learn and just requires a little practice. Learn how to use three-point lighting. Spending time to understand how light affects a video will help your videos come across as more professional. Quick wins such as putting the light source behind the camera and not the subject will help you immediately make better informal videos. However, lighting is one of those skills to pay the bills that takes careful study and practice to master.
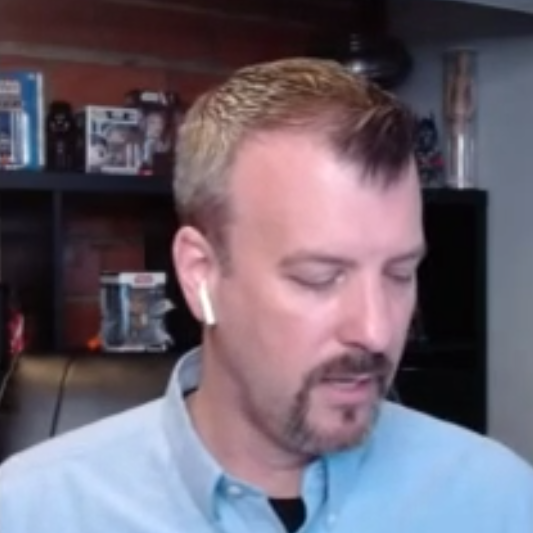
As you get started, I suggest a fairly flat look for your learning videos. By flat, I mean there are zero shadows on your subject’s face. The screenshot below is from a webinar I did where I used a ring light and a clamp light. This lit up my face and added a bit of depth to my shoulder and hair.
In movies and television, shadowy light is used to create drama, intrigue, and evoke emotion. Unless your intention for your learner is to create drama, then light up the subject’s face on both sides. Lighting should allow the message for the learner to be clear and distraction-free.
Learn now:
If you have lights, or the ability to purchase lights, the best video to learn from is Filmmaking 101 – Three Point Lighting Tutorial.
If you are looking for a good budget lighting tutorial, my favorite is Think Media’s Cheap Three Point Lighting Setup
If these options still seem too expensive, check out The Down and Dirty Lighting Kit from Wistia. For around $100 they used their skills to pull off a great three-point lighting setup. When I say they used their skills, please note my return to this concept. Skills are what make any budget lighting setup look good.
Practice Your Skills
Finally, skills will separate amateur from professional learning video. They are indeed one of the most important requirements for making professional videos. By definition, skills are the ability to do something well or with expertise. It may seem a bit obvious to you as you read about things that separate the noobs from the pros, but nonetheless these things require attention.
There is no quick fix, magic pill, or free app that will give you skills. You have to practice. Seek out ways to do things with your videos to make them better. The greatest LMS on earth is YouTube. There are so many brilliant people creating great content to help you learn those skills to pay the bills.
Summary
Honing the right skills is the key to making a professional video for learning. The more skills you have as the creator, the more effectively learners will develop the skills being presented to them in your project. Skills beget skills, and skills pay the bills. The production of scenes with high-quality audio and lighting can elevate learning videos in a way that enables the learners to trust that what they are watching is from a reputable source and not produced by some rando guy all alone in his dank basement. When you take the time to cultivate these skills and invest in the right gear that fits your budget, you’ll be making a professional and effective learning video in no time.
You can make a video like a professional! If you use these tips, please drop me a line via email or Linkedin and let me know how it went. The key is GSD!
Make it happen!
Helpful Links
Are you brand new to the “video for learning” world? Consider reviewing my four-part series, Video for Learning Fundamentals:
Part 1: The Case for Video
Part 2: We Need Learning Video Production Skills
Part 3: 5 Phases of Video Production for Learning
Part 4: The Glossary of Learning Video Terms
Do you know the 6 Types of Learning Video?
Do you need more help learning about what you should do before you show up for a video shoot? Check out my The Ultimate Checklist for Learning Video Pre-production
Looking to improve your learning video scriptwriting skills? Check out these six posts that will help you be more efficient and process-oriented.
Part 1: Scriptwriting for Learning
Part 2: The Writing Process for Learning Videos
Part 3: 4 Must-Have Skills for Writing Scripts for Learning
Part 4: 5 Best Practices as a Learning Video Scriptwriter
Part 5: 3 Learning Video Storytelling Formulas
Part 6: The Mindset for Writing Learning Videos
Share your voice with me
How do you avoid making an amateur video? Share your voice with me.
Did you like what you read? Join my learning pals. Please subscribe to my newsletter to receive free learning resources delivered to your inbox every two weeks.
THE END