I’m on a mission to help you make better videos for learning purposes. The gear you need to make learning videos exists in four categories: audio, lighting, camera, and computer. This post focuses exclusively on lighting gear. Look for my other posts on the other gear types (links down below).
If your budget is small, spend it on a microphone!
— Chris Karel
The lighting gear you need to make learning videos
There are three lighting concepts you need to understand if you are going to create professional-looking learning videos: Three-Point Lighting, Texture, and Color Temperature. Your understanding of the process of “lighting” a scene will determine what kind of lights you need for any given video. If you need to brush up on those three skills, check out this post (next week).
Because I teach DIY creators and professional vendors, I offer you my gear breakdown into four categories: minimum, essential, nice to have, and next level.
Good lighting is a skill that requires practice and should not be taken “lightly” (pun intended). If you are not using a production crew, here are a few things to keep in mind to make sure you record learning videos that look professional:
Pro-tips for professional lighting:
-
The overall look matches the subject matter
-
Shadows have soft edges (soft light is the best light for learning video)
-
There are no hot spots, bright spots, or glare
-
Use backlight to separate the subject from the background
If you plan to do a lot of the recording yourself, I suggest learning about the basics of 3-point lighting, a technique that is an industry-standard. You can get a decent overview from the following links:
How to Set up 3-Point Lighting for Film, Video and Photography
Filmmaking 101 – Three Point Lighting Tutorial
How do you want the audience to feel? Different kinds of lights, with varying styles and intensity, can give audiences tonal cues. Think about how your lighting helps convey the mood that matches your message. (YouTube Creator Academy)
Despite the advances in video editing software, you will make your life easier by lighting the scene properly. Trying to adjust the lighting in the video afterward is normal if you are an experienced editor. The process of “fixing” the lighting during editing is called color correction. Color correction is not a beginner skill. Unless you understand the process in your editing software, it will make your life easier to use good lighting before it enters the computer.
Do you want to learn how to color correct? here is a great tutorial by Justing Odisho – How to Color Correct in Adobe Premiere Pro CC (Basic Correction + Lumetri Scopes Tutorial)
If you are just getting started, here is a video of a 4-step process to light your scene.
- Set the Key Light – sun or brightest
- Place the Fill Light – or bounce
- Use a Back or Hair Light
- Adjust the “T” on the floor
Now let’s nerd out over some lighting gear you need to make all six types of learning videos.
Lights
MINIMUM
Sun
The sun can be your best source of light for your videos. If used properly, you can achieve at least two-point lighting to make your videos look professional.
Phil Ebiner, in Using Natural Light for Video Production says, For our purposes, natural light is any light that comes from the sun. It’s not artificial or man-made. The benefit of using natural light is that it’s free to use and it’s powerful! The downside is that it’s harder to control than a video lighting kit.
Here are some links to help you learn how to use the sun as a key light:
How To Use a Key Light | Photography Lighting 101
How to Use the Sun as a Key Light – PictureCorrect
If you are doing the recording yourself, learning how to use the sun to act as your key light will save you time and money. Remember, the sun is unreliable. It will change over time which could cause your videos to need color correction.
Lamps (incandescent bulbs)
A variety of house lamps positioned properly can help you light your scene. I suggest experimenting with these tools to help light your background or serve as fill lights.
Clamp Light
A clamp light that you can buy from your hardware store can certainly be a great addition to your lighting setup. Clamp light: Woods clamp light with reflector – (~$10)
ESSENTIAL
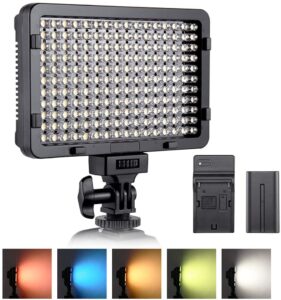
Mini LED Panel
My favorite light for under a hundo is the ESDDI LED Video Light (~$50). It’s battery-operated, bi-color (meaning you can make it orange or blue) and it’s super portable. You can use it for a key light for cell phone videos or as a hair light in your full setups.
LED Panel Kit
After relying on professionals to rig up thousand-dollar-lights for the past decade, it took a lot of convincing to purchase a light kit designed for the DIY video creator. But, I have been blown away by the quality of the GVM 3 Pack LED Video Lighting Kit (~$300). It was recommended by Sean Cannell of Think Media. He is a dynamic video creator that helps teach people how to grow their YouTube channel. He offers great advice on tools and techniques even if his focus rarely touches on learning video.

Ring Light
I have an IVISSI Ring Light with Remote Controller (~$150), and I use it weekly. It costs a little more than what people are paying for the Neewer brand lights. The accessories like a bag and several nice shoe mounts helped convince me to make the purchase. However, the negative reviews about the dials are correct. They are a little wonky and they don’t accurately adjust the light on the first touch. It takes a bit of getting used to. However, the remote control is awesome and works perfectly every time.

NEXT LEVEL
On a traditional video shoot with a video crew, I recommend the following lights.
Dracast LED1000 Pro Bi-Color 3-Light Studio Kit with V-Mount Battery Plates (~$2,500)
Kino Flo 4Bank 4′ Gaffer 2-Light Kit (~$3400)
Kino Flo Diva-Lite 30 LED DMX Kit Universal with Soft Case (~$2,400)
Lowel DV Core 250 Kit with GO-85 Case (~$1,100)
Accessories
Reflector – Impact 5-in-1 Collapsible Circular Reflector with Handles (42)(~$50)
Gloves – leather ~$15, SetWear Grip Gloves (~$49)
Clothespins (C-47s) – Home-X Wooden Clothespins. (~$8)
Gels/Diffusion – Rosco Diffusion Kit (~$30) | Rosco Color Correction Filter Kit (~$30)
Gaffer Tape – Non-stick-NoResidue (~$15)
Flags (sheets of foam core to block light) – Digital Juice Flag Kit Pro, 24”x36” (~$350)
Dimmers – Impact D1000 1000W AC Analog Dimmer Control (110-120V) (~$40)
Extension cords (AKA stingers) – nothing smaller than 13 amp/16 gauge
Helpful Links
Using Natural Light for Video Production – great tips from Phil Ebiner
How to set up lighting at home when you have no budget
How to Get the Perfect Lighting for Video
Summary
Lights are not as important as the microphone, but they will make your videos look more professional IF YOU USE THEM PROPERLY! Light is simply a tool. Your skills will determine the efficacy of the tool. Purchase a light (or light kit) that aligns with your budget until your skills match a higher quality product. With lights, you can spend as little as $10 or as much as $4k. The cost should not be the determining factor in your purchase, but we only have what we have. So, I suggest you master the pro-tips for pro lighting. Use light to match your subject matter, avoid harsh edges, keep things even and free from hot spots, and, finally, buy a light to serve as a backlight. It will change everything for you!
Join my learning pals
What lights have you used in your learning videos and how well did they work? Share your voice with me.
Did you like what you read? Join my learning pals. Please subscribe to my newsletter to receive free learning resources delivered to your inbox every two weeks.
THE END