The Fifth Step Toward Making Learning Videos: Edit Your Video
Summary: The VFL module on Edit Your Video provides an acronym, PEACHY. Follow the steps of the PEACHY process, which stands for Plan, Edit, Add, Clean, Hone, and Yes! Each step is essential to achieving the final video that you want.

Click here to enroll in the online VFL program today
This is where the real magic happens: editing your video. In this post, I’ll guide you through the process of turning your raw footage into a polished masterpiece. And don’t worry, we’re going to make it PEACHY.
SELFIE PRACTICE
Before we get started, do a quick selfie using the CLASSY method. By now, you should be a pro at setting up and recording your videos, but let’s take it up a notch and add some personality to your delivery.
Grab your phone and open up the selfie video camera. Hold it up in front of your face and hit record. Now, say the following into the camera: “This is how I make a video now! Hello, this is [insert your name]. I know how to setup and record a video using the CLASSY method.”
Remember, the key to improving your on-camera presence is to keep making and deleting the ones you don’t like. So, I encourage you to try making six of these at one time and then keep only the one you like. Done is better than perfect!
Now that you’ve got your footage, it’s time to start editing.
Sneak Peek of the Module 5 Introduction
Edit Your Video
- Here’s What You’ll Learn
Practicing your selfies will improve your performance
How to edit your video clips using the PEACHY method
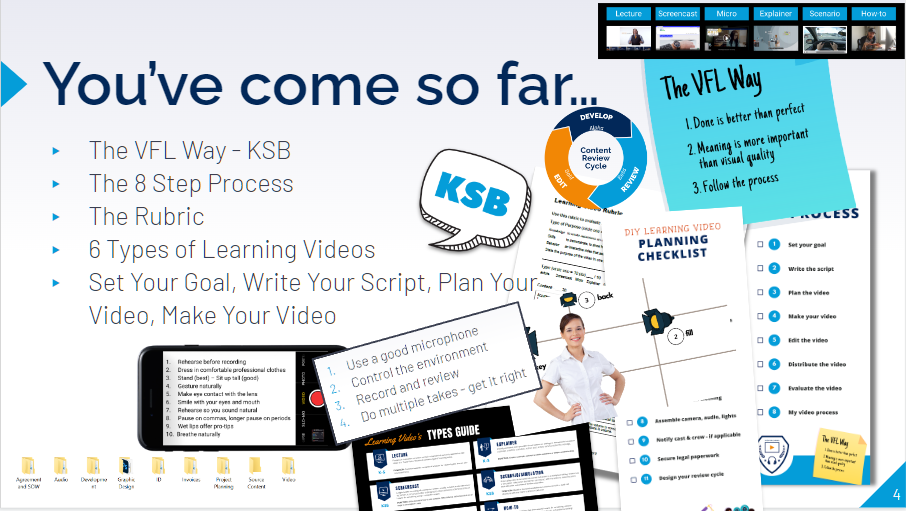
At this point in the VFL course, you would have learned so many things. By now, you should have a Source Files folder ready to be imported into your editing suite. As you know by now, making a video is a complex set of processes that challenge every beginner.

Acronyms help us remember. Recording or making the video was all about making it “CLASSY.” Step 5: Edit the video is about making it PEACHY.
Make it PEACHY!
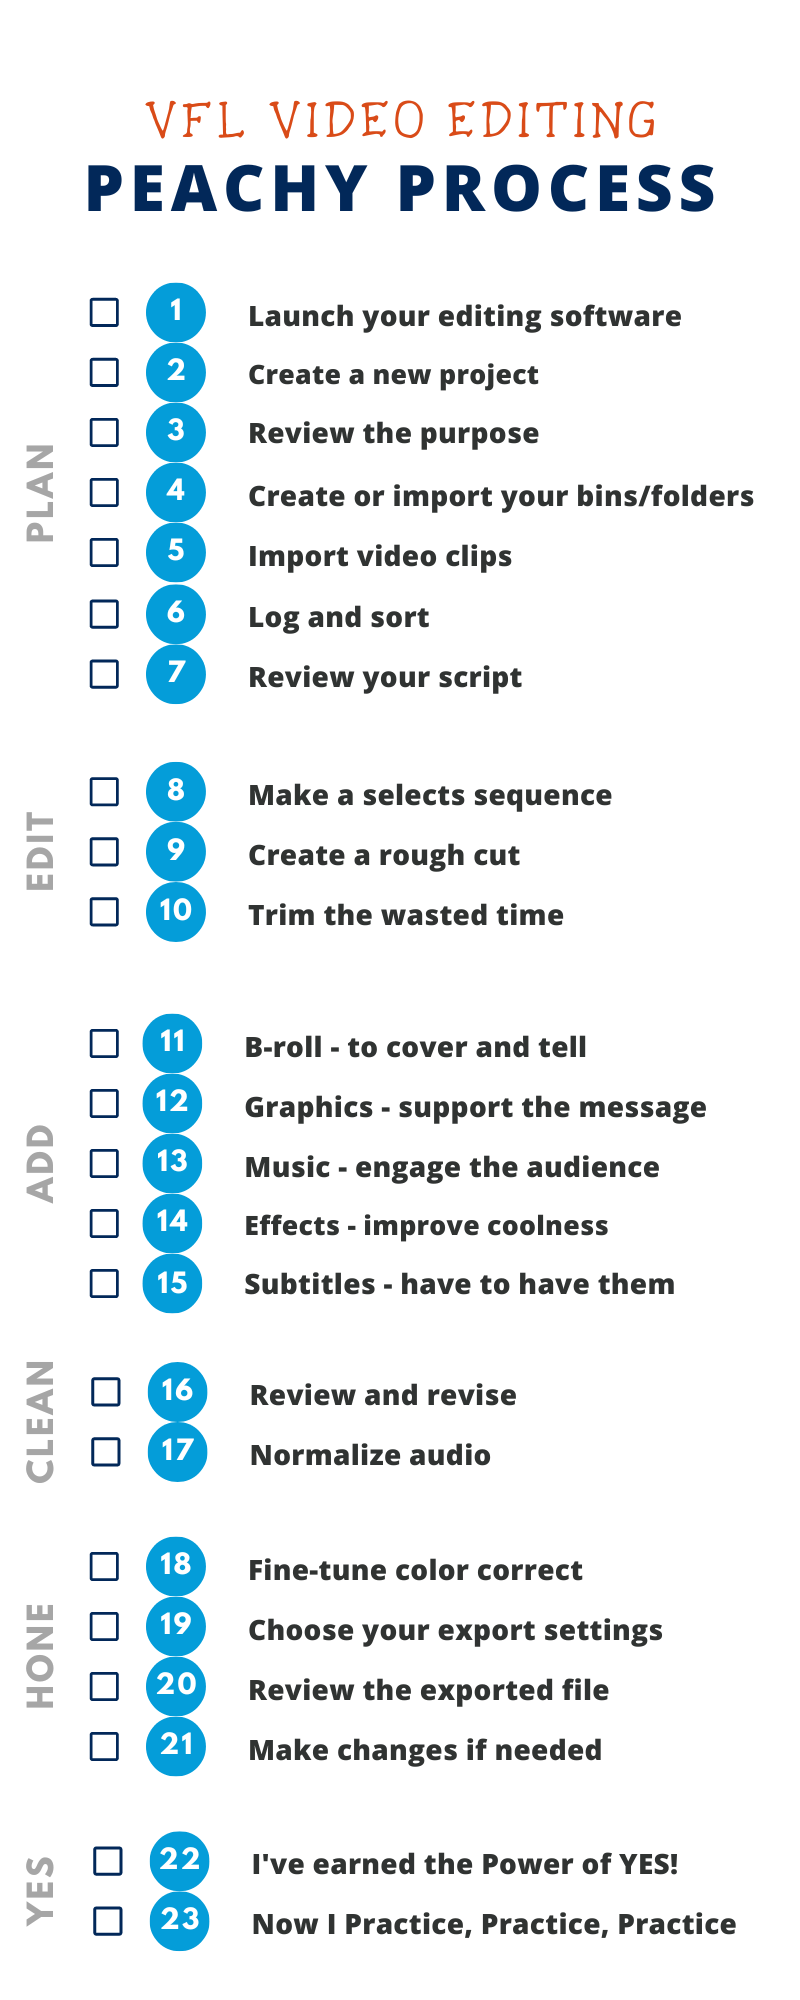
I’ve broken down the learning video editing process into this handy, easy-to-remember acronym:
Plan
Edit
Add
Clean
Hone
Yes! It’s Good!
Follow the PEACHY process and you’ll end up with a “peachy” learning video. By the end of this step, you’ll have a completed sequence ready for distribution.
No matter how frustrating this module becomes, remember done is better than perfect!
You will get this!
You will earn a YES from yourself!


Here is where you would head over to the VFL Scholar Workbook.
 This lesson work is rooted in using Adobe Premiere Pro
1. The PEACHY process – “P” is for Plan
In this lesson, you will learn how to edit your video for learning purposes. Start by reviewing the purpose of your video and ensure that the appropriate cues are used to achieve that purpose. Then, create or import bins/folders in your editing software and import raw video clips. Log and sort the video clips according to subject or scene. Lastly, review your script and mark the timecode of good takes before moving on to the editing stage. By following these steps, your editing will be grounded in your business purpose and the final product will be effective in achieving your intended goal.
2. The PEACHY process – “E” is for Edit
In this video lesson, you learn that the “E” in PEACHY stands for Edit. When editing, it’s best to create a selects sequence and a rough sequence. A selects sequence is where you drag your best clips onto a track on your video editor’s timeline. A rough sequence is where you assemble the video in the sequence that the writer intended. Afterward, you should trim the clips to leave only the necessary parts on the timeline. You can use the head and tail of the clip to remove empty space or the part of the clip you don’t need. The trimming process is often what people think of as editing. The video teaches you how to use ripple delete to remove unwanted gaps or clips.
3. The PEACHY process – “A” is for Add
This lesson is all about adding elements to your edit to make it look like a pro video. Start by adding b-roll, which is non-talking footage, and use shots of the scene or actions to cover the cuts, making things flow and adding visual interest. Then, add the titles, graphics, and icons sparingly, making sure they support the video’s message. Reserve music for your intro/outro sections or when you are changing scenes, and use long fades to mesh music with audio. Transitions are subtle animations that tie separate video clips together, and there are many different types built into your editing software, but it is best to keep them fairly basic: cut, dissolve, or a wipe. Finally, add subtitles, which are excellent at holding attention and retaining information.
4. The PEACHY process – “C” is for Clean
In this lesson, you will learn about the importance of reviewing and revising your video sequence. This step involves watching your video from start to finish and making adjustments to ensure that the clips are appropriately timed, and there are no sudden volume changes. You’ll also learn how to normalize audio and make sure that your overall mix, dialogue, music, and sound effects are at appropriate levels.
5. The PEACHY process – “H” is for Hone
Hone is where you will learn how to hone, or refine, your video by fine-tuning color correction and exporting your video at the highest possible quality. Color correction involves ensuring that pure white is consistent throughout the video, and you’ll learn how to choose export settings that are appropriate for your final delivery method.
6. The PEACHY process – “Y” is for YES, YES, Y’all!
The Y in PEACHY will stand for YES! Everyone will love to hear yes. It will make you feel good and give you confidence. As you review your exported videos in the future, work hard to earn a YES from yourself. You will deserve it!
In this lesson, you will learn how to edit your learning video like a professional by putting in the hours to achieve mastery. As you review your exported videos, you will work hard to earn a YES from yourself and believe that you know what effective learning videos look like. You will practice, practice, practice, and not judge yourself when you make mistakes or have to redo parts of your edited video because it’s all a part of the process. The goal is to get to YES, and no one is perfect, so great videos are not created after one try. Once you have achieved mastery, you will share your learning video with the world in the next step.
Summary
This post outlined the PEACHY method for editing your footage into a polished masterpiece. Start by practicing your on-camera presence with a quick selfie using the CLASSY method. Then, follow the steps of the PEACHY process, which stands for Plan, Edit, Add, Clean, Hone, and Yes! Each step is essential to achieving the final product that you want. Remember, done is better than perfect, so keep at it and follow the PEACHY process to create an effective and engaging video for your audience.
Helpful Links
Where To Find Photos, Music, Graphics, Icons And Sounds For Your Training Or Instructional Video
What is the VFL Way? – Video For Learning
How to edit a video – putting the P in the PEACHY method – VIDEO tutorial
How to edit a video – putting the E (editing phase) in the PEACHY method – VIDEO tutorial
How to edit a video – putting the A (Add phase) in the PEACHY method – VIDEO tutorial
How to edit a video – putting the C (Clean phase) in the PEACHY method – VIDEO tutorial
How to edit a video – putting the H (Hone phase) in the PEACHY method – VIDEO tutorial
How to edit a video – putting the Y (Yes phase) in the PEACHY method – VIDEO tutorial
The Proven 15-step Checklist To Easily Make Weekly Videos
4 Proven Things You Need To Make Effective Training
How to Make a Video by Yourself
The lighting gear you need to make learning videos
The audio gear you need to make learning videos
Do you want to learn how to make your own videos like a pro?
Contact me today if you want to learn more about how to make your own or look for the link down below to sign up for the online course. And I can’t wait to help you on your journey.

Click here to enroll in the online VFL program today


