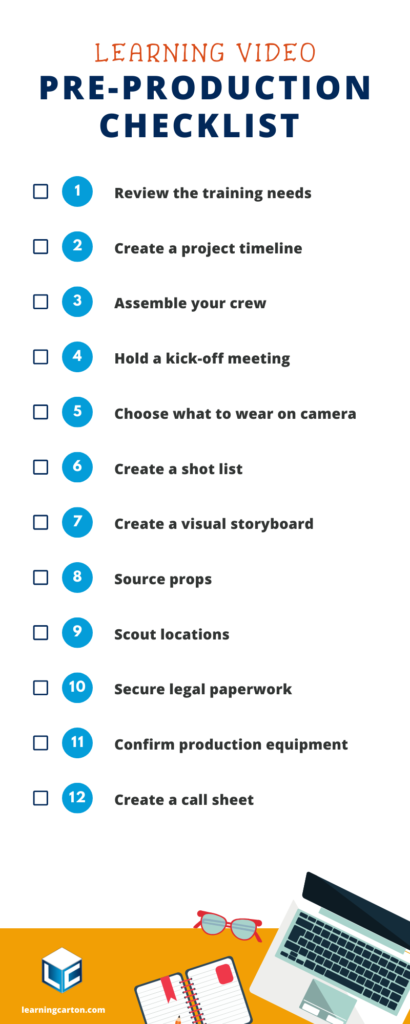
This post focuses on the 12 things you need to do before you start recording video. Complete with a checklist, I will give you the twelve things you need to do during learning video pre-production to make it a professional success.
So let’s get to it!
This is all about the Benjamins, baby:
“Failing to plan is planning to fail.” – Ben Franklin
How to Plan a Learning Video
Making a professional learning video must begin with pre-production. A simple google search will yield pages of guidance on how to prepare for a video shoot. However, what I found missing over the years is pre-production guidance that focused solely on the process of creating a video for learning. The purpose of video for learning is to improve knowledge, skills, and behaviors. So let’s get practical! Use this checklist to plan your productions. Then, let me know how it goes. If it helps, sing this High School Musical song to help spark your feelings of working together toward a common goal!
We’re all in this together
Once we know
That we are
We’re all stars
And we see that
We’re all in this together
Review the training needs
Before you spend valuable time and money preparing for your shoot, review the needs of the organization again. Pre-production is the perfect time to make sure everyone is on board with the video approach. You can use this moment to show everyone why creating this video will be the best way to instruct people on the topic(s) at hand. As you plan, ensure that the video is designed to reinforce the learning strategy and design document. If you don’t have a learning strategy and design document at this point, get one! Take time on a conference call or at an in-person meeting to review the overall goals of the training program with your team. Make sure the budget is allocated properly and priority has been given to learner engagement in all decisions.
Create a project timeline
A project timeline establishes due dates and milestones so project managers can effectively evaluate progress. It lets everyone know what the project will accomplish, who will do the work and by when it should be completed. Use a template to make it easier to get started. I use a project timeline built-in Google Sheets that contains drop-down menus for each of the project phases. I think of the project timeline as one of the most valuable parts of learning video pre-production. It helps everyone know where we are at any given point in time.
Pro-tip: Pad your review cycles to provide enough time for both internal and external reviews. 3 days internal, 5 days external.
Review cycles are the most critical element of a project timeline. The review cycle is the period of time it takes for the video project team and the clients to look at a deliverable and provide feedback. If possible, pad your review cycles with an extra day or two. Each project I work on includes internal reviews – including a Quality Assurance (QA) review – and two rounds of client review. After each review, feedback is addressed. This could mean making changes to the deliverable or explaining why no changes were made. The final review stage for each phase of the timeline is “Final Approval.” Asking everyone involved to sign-off on each stage of the process ensures that the work stays on time, on budget, and of high quality.
Here’s a helpful link to Next Thought Studios’ production timeline post, straight from the video production world. For additional information, check out Clarizen’s Project Timelines: Why They’re So Important. They make a great case for placing a project timeline process at the core of your management.
Assemble your crew
Hire a camera crew for the days you are going to record. Once you’ve signed a contract with them, ask them to take part in preparations. If they are true professionals, they will want to be included in as much of the decision making as possible. If you are running the shoot yourself, look for an experienced vendor with a good reputation. At a minimum, include the crew (or head of the crew) on all production planning communications to avoid surprises during production.
If you’ve never hired a video production crew before, here are four things to do when looking for a vendor:
1. Seek recommendations.
Most of the video productions I’ve worked on as a vendor came via recommendation. There is no substitute for testimonials from people you trust.
2. Review their previous work.
View samples of their work on their website or ask for comparable videos based on what you are trying to produce. Do they have experience with the type of video you’re looking to make?
3. Ask for a proposal.
If you ask a vendor for a proposal and they only give you a price quote, walk away. By asking for a proposal, you are looking for attention to detail. The proposal will demonstrate their communication skills, an understanding of your organization’s needs, and the ability to build a positive business relationship.
4. Focus on communication.
When you engage prospective video production vendors, evaluate their business acumen. Pay close attention to their written and spoken communication. As I mentioned above, the proposal is just one example. A professional corporate video is made by individuals with a wide range of personalities and abilities. Confirm in person that the vendor you choose communicates in a way that aligns with your organization.
Hold a kick-off meeting
The kick-off meeting should include the key members of your team all together in-person or on a conference call. The project manager should drive this meeting to make sure everyone is on the same page right from the beginning. If you are using an outside vendor, then they should absolutely be there. Below is a sample agenda of a video project kick-off call.

Choose what to wear on camera
Reach out to your talent and your project managers to make sure everyone understands the importance of wardrobe, or what to wear on camera. Adhering to a few basic rules will ensure that your production looks professional. In most learning video pre-production situations, the wardrobe is provided by the talent or the company involved. Send an email to the talent and the client with a wardrobe checklist. Follow-up with a phone call to anyone who will be on camera. It’s important to talk this through before the day of recording.
Create a shot list
Once you have final approval on your script or storyboard, it’s time to make a shot list. A shot list documents the order in which you plan to record each scene. It is used as a checklist on the day of recording: each shot is numbered, notated by the type of shot and if the camera is moving.
To make your life easier, please download the version I have saved in my own Custom Office Templates in Word: Shot List. I’ve developed some handy dropdown boxes to make it easier to note the type of shot and the type of camera movement. The description detail should be a sort of shorthand based on the storyboard/script blended with your video director’s notes for the camera crew.
Create a visual storyboard
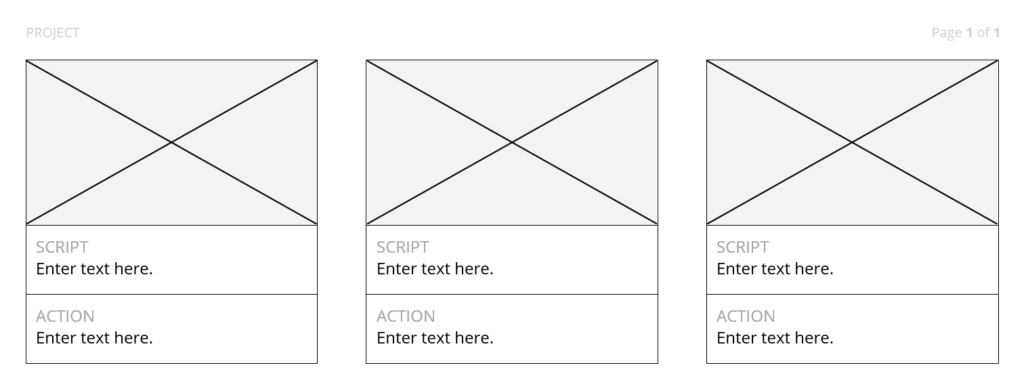
A visual storyboard is a document that contains a series of panels with images in them that depict the changes and action in each scene. For years, I created these on paper or by using Word documents or Photoshop templates. The Word documents proved to be valuable because I could send it off for others to mark up using tracked changes.

I have found that visual storyboards don’t matter much to training video project managers. Their focus is on the learning content: dialogue, learning objectives, and core subject matter. Most training professionals are not interested in the details of wide shot vs. close-ups or transitions from one scene to the next.
The visual storyboard is a crucial tool for the creative team that is making the video. Remember that all of these seemingly “little” decisions all add up to the look, feel, and success of the final product. If possible, I suggest using an online tool like Plot instead of a Word document. The online interface allows for faster feedback and easier real-time collaboration with your internal and external teams. On top of all that, the tool is just plain intuitive to use. I have used it to storyboard several projects and will never go back to a Word document or Photoshop file again. The price is right too. At the time of this post, the tool is less than $10/month with no contract. This tool is invaluable to my professional learning video pre-production processes.

Source props
While breaking down your script/storyboard, take note of the props you’ll need to execute each scene. The term “break down” means to skim it for details that will be important on a video shoot. Ask yourself, “Will I be able to use items at the location or will I need to bring them to the scene?” Corporate productions make it easier to source props because you typically shoot on location. However, when you show up to scout the locations (the next item on the checklist), have a list of props ready to discuss with your contact at the location. Learning video pre-production requires that you be agile and prepared!
Have backups of every product that will be featured in each scene, in case one gets damaged. Set dressing is an art that can take years to hone, but a few trusty items can always help improve a scene. Use canned air to remove dust along with window cleaner and a chamois or paper towel to remove smudges and grime. Gaff tape will probably save your life more than once (just like duct tape, but without the leftover residue when you remove it), so keep several rolls on hand. It’s pricey, about $17 a roll, but well worth the expense.
Scout locations
1. Locate power
A fruitful location scout includes locating electrical outlets you can use to power the camera, lights, and review monitor.
2. Listen carefully
It is also imperative to check audio levels by listening with your camera microphone for unwanted noises like appliances, heat/air conditioning, or traffic. Make sure to do this with the same equipment you plan on using to make the video if you can.
3. Ask about interruptions
Ask your contact at the location about foot traffic of employees or other people at the time you plan to record.
4. Photograph the scene
Finally, take photos of potential scenes. Try to find the angles you would like to use for each scene so that the crew has a visual reference to discuss when planning and building them out.
Secure legal paperwork
If you are shooting in public or using space at a company’s office, make sure to gather the proper permissions. In a corporate setting, permission may be informal, or it may involve picture identification and confiscation of cell phones to protect intellectual property. Best practice suggests raising the questions: Will we need written permission to record here? If yes, what can we do to make things move smoothly?
Operating with a video crew requires insurance to protect damage to the equipment, location, and any claims of physical injury. If you plan to film in a public location, obtain proof of insurance before you even think about seeking a permit from the city or municipality.
Talent release forms are standard in corporate productions. Use a template like the one seen above. Modify it so that it fits your organization. Make sure employees and any paid/unpaid talent sign the release forms. This can be a tedious process, but it could save you thousands of dollars in a lawsuit, or extra expenses from having to re-shoot because someone sent a cease and desist letter.
Confirm production equipment
At this point in the checklist, you should have a firm idea of location, talent, scenes, and dialogue. Take one last look at the shot list, storyboard/script, and location notes. Compare your preparations with the equipment you plan to use to make sure you have what you need to execute your plan.
If you’ve hired a production crew, they will handle this detail with you. Be sure to ask if they have the proper lighting and enough access to their chosen method of power for their equipment. There’s nothing worse than a production coming to a halt because the camera ran out of batteries right before shooting a scene in a location with no outlets!
Create a call sheet
Summary
With the checklist in hand, you will be ready to operate a professional learning video pre-production process. You will be one step closer to delivering on the promise of learning video: to improve knowledge, skills, and behaviors. Using the checklist will ensure that pre-production targets the needs of a learning production and not the focus of marketing and advertising. Once you’ve crossed off every item on the pre-production checklist, it’s time to actually make the video! It’s a good idea to keep extra copies of all of the documentation you made during this stage and have it in hand on your recording days.
- Review the training needs
- Create a project timeline
- Assemble your crew
- Hold a kick-off meeting
- Verify what to wear on camera
- Create a shot list
- Create a visual storyboard
- Source props
- Scout locations
- Secure legal paperwork
- Confirm production equipment
- Create a call sheet
Please let me know how it goes. If it helps, to sing the High School Musical song to help spark your feelings of working together toward a common goal! “We’re all in this tog..”
Make it happen!
Helpful Links
Are you new to learning about video for learning? Consider reviewing my four-part series, Video for Learning Fundamentals.
Part 1: The Case for Video
Part 2: We Need Learning Video Production Skills
Part 3: 5 Phases of Video Production for Learning
Part 4: The Glossary of Learning Video Terms
Looking to improve your learning video scriptwriting skills? Check out these six posts that will help you be more efficient and process-oriented.
Part 1: Scriptwriting for Learning
Part 2: The Writing Process for Learning Videos
Part 3: 4 Must-Have Skills for Writing Scripts for Learning
Part 4: 5 Best Practices as a Learning Video Scriptwriter
Part 5: 3 Learning Video Storytelling Formulas
Part 6: The Mindset for Writing Learning Videos
Join my feedback loop
What formula or template do you need? Drop me a note and let me know.
If you liked what you read, and would like to join the conversation, please consider subscribing to my newsletter to receive free learning resources delivered to your inbox every two weeks.
I love feedback loops. As Elon Musk said, “I think it’s very important to have a feedback loop, where you’re constantly thinking about what you’ve done and how you could be doing it better.”
THE END


